

Grinding a solid is one of the oldest ways of making a slow reaction fast. Pharmaceutical tablets are milled to a controlled particle size so that they dissolve at a predictable rate, cement is ground to a specified fineness because that is what fixes how quickly concrete sets, and a power station burns pulverised coal in seconds where a lump of the same coal would smoulder for hours. In none of these cases has the chemistry been changed. What has changed is the amount of surface at which the reaction is allowed to happen.
A reaction between a solid and a solution can only take place where the two phases meet, so its rate is proportional to the area of that interface. Dividing a fixed mass of metal into smaller pieces leaves the mass, the number of moles and the total energy available for release exactly as they were, but multiplies the area over which acid can arrive. Surface area therefore changes how fast a reaction runs without changing how far it goes or how much heat it gives out, and keeping those two ideas apart is the main intellectual work of this laboratory.
In this laboratory you will run one reaction twice and change one thing about it. Both parts put 0.60 g of magnesium into 100 mL of 1 mol/L hydrochloric acid in a closed calorimeter fitted with a stirrer and a digital thermometer; Part 1 uses magnesium powder and Part 2 an equal mass of magnesium ribbon. For each run you will note the initial temperature, follow the temperature against time on the tablet graph, read off the maximum temperature and time how long the reaction takes to finish. Because the two runs contain the same number of moles of magnesium, they are expected to release the same quantity of heat; what you are asked to compare is the rate at which that heat appears.
Educational Goals
Surface area and reaction rate
- Predict, before running either part, which form of magnesium will react faster, and justify the prediction in terms of the frequency of collisions at the solid–liquid interface.
- Estimate the exposed area of a powder and of a ribbon of equal mass, and state what that ratio does and does not predict about the two reaction times.
Reading a temperature–time curve
- Take an initial temperature, a maximum temperature and a time to completion off a temperature-against-time graph, and decide that a reaction has finished from the shape of the curve rather than from the clock.
- Explain why each curve is steepest in its middle third and flattens at the end, and why it then begins to fall.
Separating rate from energy
- Show that the two parts contain identical numbers of moles of magnesium and therefore release identical quantities of heat, and explain why dividing the metal cannot change either the enthalpy of reaction or the activation energy.
- Account for any difference between the two maximum temperatures as heat lost during the longer run, rather than as a difference in the chemistry.
Quantitative calorimetry
- Calculate the moles of magnesium and of hydrochloric acid, identify the limiting reagent and confirm that the acid is in excess in both parts.
- Convert a measured temperature rise into a quantity of heat and then into an enthalpy of reaction per mole of magnesium, and compare it with the accepted value.
Controlled comparison and laboratory practice
- Hold mass, acid concentration, acid volume, stirring and starting temperature identical between the two runs, and say why each of them has to be controlled for the comparison to mean anything.
- Handle a corrosive acid and a finely divided reactive metal with the correct protective equipment, and rinse the calorimeter and cylinder into the recovery tank between runs so that the second part starts from the same conditions as the first.
Protocol
Part 1 : Reaction of magnesium powder with hydrochloric acid
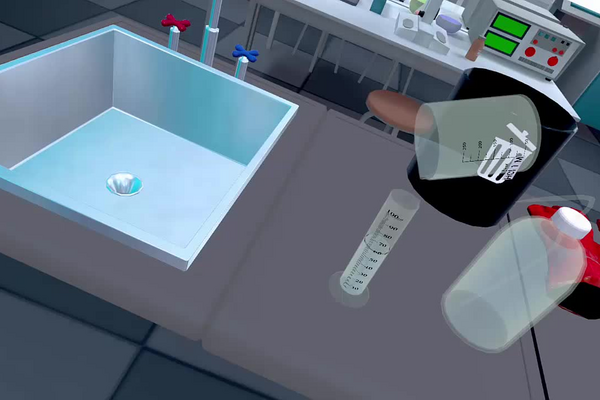
- Measure 100 mL of hydrochloric acid (HCl) 1M using the graduated cylinder.
- Pour the contents of the graduated cylinder into the calorimeter.
- Immerse the tip of the digital thermometer in the liquid to take its temperature.
- The initial temperature of the liquid in the calorimeter will appear in the results table.
- Weigh approximately 0.6g of magnesium (Mg) powder.
- Pour the contents of the weighing boat into the calorimeter.
- Put the lid on the calorimeter.
- Insert the digital thermometer into the calorimeter lid.
- Start the stopwatch.
- Activate the green button of the stirrer on the calorimeter lid.
- The graph of temperature as a function of time is on the tablet (graph tab).
- Note the final temperature when the reaction ends (after about 84 seconds).
- Stop the stopwatch.
- The results are found in the results tab on the tablet.
- Stop the agitator by pressing the red button.
- Remove the thermometer from the calorimeter lid.
- Remove the calorimeter lid.
- Empty the contents of the calorimeter into the recovery tank.
- Rinse the calorimeter with distilled water and empty its contents into the recovery tank.
- Rinse the graduated cylinder with distilled water and empty its contents into the recovery tank.
- Reset the stopwatch.
Part 2 : Reaction of magnesium ribbon with hydrochloric acid
- Measure 100 mL of hydrochloric acid (HCl) 1M using the graduated cylinder.
- Pour the contents of the graduated cylinder into the calorimeter.
- Immerse the tip of the digital thermometer in the liquid to take its temperature.
- The initial temperature of the liquid in the calorimeter will appear in the results table.
- Weigh approximately 0.6g of magnesium (Mg) ribbon.
- Pour the contents of the weighing boat into the calorimeter.
- Put the lid on the calorimeter.
- Insert the digital thermometer into the calorimeter lid.
- Start the stopwatch.
- Activate the green button of the stirrer on the calorimeter lid.
- The graph of temperature as a function of time is on the tablet (graph tab).
- Note the final temperature when the reaction ends (after about 140 seconds).
- Stop the stopwatch.
- The results are found in the results tab on the tablet.
- Stop the agitator by pressing the red button.
- Remove the thermometer from the calorimeter lid.
- Remove the calorimeter lid.
- Empty the contents of the calorimeter into the recovery tank.
- Rinse the calorimeter with distilled water and empty its contents into the recovery tank.
- Rinse the graduated cylinder with distilled water and empty its contents into the recovery tank.
- Reset the stopwatch.
- Note the time required until the end of the reaction, determined by the stabilization of the temperature. Compare to the reaction from part 1 carried out with magnesium powder.
Anticipated Outcomes
The reaction and the limiting reagent
Magnesium is oxidised by the hydronium ions of the acid and hydrogen is released:
Mg(s) + 2 HCl(aq) → MgCl2(aq) + H2(g)
With M(Mg) = 24.31 g/mol, the mass weighed out in each part is n = m / M = 0.60 g / 24.31 g/mol = 0.0247 mol, and the acid supplies n = C × V = 1.0 mol/L × 0.100 L = 0.100 mol of HCl. The equation requires two moles of acid per mole of metal, so 0.0247 mol of magnesium consumes 0.0494 mol of HCl and leaves 0.051 mol behind: the acid is present in almost exactly twofold excess and magnesium is the limiting reagent in both parts. This matters for the comparison, because it guarantees that both runs go to completion and that both consume the same amount of metal. Neither part can be stopped early by running out of acid, so any difference between them is a difference in rate and not in extent.
Expected results
| Quantity | Part 1 — magnesium powder | Part 2 — magnesium ribbon |
|---|---|---|
| Mass of magnesium | 0.60 g | 0.60 g |
| Moles of magnesium | 0.0247 mol | 0.0247 mol |
| Acid | 100 mL HCl 1.0 mol/L | 100 mL HCl 1.0 mol/L |
| Initial temperature | 21 °C | 21 °C |
| Temperature rise | 25 °C | 22 °C |
| Maximum temperature | about 46 °C | about 43 °C |
| Time to completion | about 84 s | about 140 s |
| Heat released | about 11 kJ | about 11 kJ |
| Mean rate of consumption of Mg | 2.9 × 10⁻⁴ mol/s | 1.8 × 10⁻⁴ mol/s |
The energy released is the same in both parts
The heat given out is the enthalpy of reaction times the number of moles that react. Taking ΔH = −440 kJ per mole of magnesium:
q = n × |ΔH| = 0.0247 mol × 440 kJ/mol = 10.9 kJ ≈ 11 kJ
Both parts contain 0.0247 mol, so both release about 11 kJ. Working the same calculation backwards from a temperature rise gives the enthalpy the student can actually measure. The heat is absorbed by 100 mL of solution, which has a mass of about 100 g and a specific heat capacity close to that of water, plus the calorimeter itself:
q = (m·c + Ccal) × ΔT and ΔH = −q / n
Ignoring the calorimeter for a first estimate, m·c = 100 g × 4.18 J/(g·°C) = 418 J/°C, so 11 kJ should raise the temperature by 10 900 J / 418 J/°C = 26 °C. Part 1 delivers 25 °C, which is within a degree of that prediction, and reversing the calculation gives ΔH = −(418 × 25) / 0.0247 = −423 kJ/mol. The accepted value for Mg(s) + 2 H+(aq) → Mg2+(aq) + H2(g) is −466.9 kJ/mol, so the measurement recovers about 91 % of the textbook figure — a normal outcome for a simple calorimeter, and the same shortfall recorded in laboratories 059 and 060 with the same apparatus.
The important consequence is that the two maximum temperatures ought to be equal. Surface area cannot change ΔH, it cannot change the number of moles, and it cannot change the heat capacity of the contents, so the final temperature is fixed by the chemistry and not by the form of the metal. The 3 °C by which Part 2 falls short of Part 1 is therefore not a surface-area effect at all: it is heat that escaped through the walls of the calorimeter during the extra 56 seconds the ribbon needed. Treating that difference as evidence that the ribbon “released less energy” is the single most common error in interpreting this experiment.
The size of the loss can be checked. If the calorimeter loses heat at a rate proportional to its excess temperature, ΔT = ΔT0 × exp(−t/τ), then losing 3 °C more over an extra 56 s at a mean excess of about 15 °C requires τ ≈ 15 × 56 / 3 ≈ 280 s. A time constant of a few minutes is what an open beaker gives, not a well-insulated calorimeter, so the model behind these two numbers is a distinctly leaky vessel. A student who reports both maxima and explains the difference this way has understood more than one who happens to record two equal values.
Why the powder reacts faster
A solid reacts only at its surface, so the rate is proportional to the area in contact with the acid. Magnesium has a density of 1.74 g/cm3, so 0.60 g of it occupies V = m / ρ = 0.60 / 1.74 = 0.345 cm3 whatever shape it is in. That fixed volume can be arranged as one long thin strip or as several hundred thousand small spheres, and the areas are very different.
| Geometry of 0.60 g of magnesium | Powder | Ribbon |
|---|---|---|
| Volume of metal | 0.345 cm3 | 0.345 cm3 |
| Assumed form | spheres, diameter 100 µm | strip 3.0 mm wide, 0.15 mm thick |
| Number of pieces | about 660 000 | 1 piece, 77 cm long |
| Exposed area | about 210 cm2 | about 48 cm2 |
| Predicted ratio of initial rates | about 4.3 : 1 in favour of the powder | |
| Smallest half-dimension to dissolve through | 50 µm (particle radius) | 75 µm (half the thickness) |
| Observed time to completion | 84 s | 140 s |
| Implied rate of surface recession | 0.60 µm/s | 0.54 µm/s |
For spheres the area of a fixed volume varies as A = 6V / d, so halving the particle diameter doubles the area. The area of a sphere is proportional to r2 while its volume is proportional to r3, which is why the ratio of area to volume is proportional to 1/r and why fine division is so effective: the 100 µm powder assumed here already has four times the area of the ribbon, and a 25 µm powder would have sixteen.
Why the times differ by less than the areas
A four-to-one advantage in area does not produce a four-to-one advantage in the time to finish, and the measured times — 84 s against 140 s, a ratio of only 1.7 — show it. The reason is worth following, because it is the most instructive point in the laboratory.
While the acid remains in excess, its concentration at the metal surface is roughly constant, so each square centimetre of magnesium dissolves at the same rate everywhere and the surface simply recedes into the metal at a constant linear speed u. The reaction is over when the surface has eaten through to the middle of the piece — that is, when it has travelled the smallest half-dimension of the solid. For the powder that distance is the particle radius, 50 µm; for the ribbon it is half the thickness, 75 µm. The predicted ratio of the two completion times is therefore 75 / 50 = 1.5, against the 1.7 observed, and dividing each distance by its time gives u = 50 µm / 84 s = 0.60 µm/s and u = 75 µm / 140 s = 0.54 µm/s — the same recession speed to within about 10 %, as this picture requires.
So the total area sets the initial rate, which is what a gas-collection or mass-loss experiment measures, while the thickness of the individual piece sets the finishing time, which is what this experiment measures. A student who expects the times to scale like the areas has made a defensible prediction and can be shown, from the data, why it does not hold.
What the shape of each curve shows
Neither trace is a straight line. Each starts shallow, steepens through its middle third, then bends over and flattens as the metal runs out; after the maximum, both drift slowly downwards as the calorimeter cools. Two opposing effects produce the S shape. The reaction heats its own contents by about 25 °C, and a rate constant rises steeply with temperature. Using the Arrhenius relationship with an activation energy of the order of 60 kJ/mol:
k2 / k1 = exp[ (Ea/R) × (1/T1 − 1/T2) ] = exp[ (60 000 / 8.314) × (1/294 − 1/319) ] = exp(1.92) ≈ 6.8
so by the end of the run the metal is dissolving roughly seven times faster per unit area than it was at the start. Pulling in the other direction, the acid is being used up: 0.0494 of the 0.100 mol is consumed, so its concentration falls from 1.00 to 0.51 mol/L and roughly halves the rate. The two effects together predict a net acceleration of about three and a half times through the run, which is what makes the middle of each curve the steepest part, and the reason it finally flattens is neither of them — it is simply that the magnesium has been used up. Laboratory 059 develops the Arrhenius treatment in more detail with the same apparatus.
One product is easy to overlook. The 0.0247 mol of magnesium liberates the same number of moles of hydrogen, and at room conditions that is V = nRT/P = (0.0247 × 8.314 × 294) / 101 325 = 6.0 × 10⁻⁴ m3, about 0.60 L of hydrogen inside a closed calorimeter. Bubbles on the metal surface are also part of the kinetics: gas clinging to the powder shields part of its area, which is one of the reasons the stirrer is switched on before the temperature is followed.
Summary of Assignment by Grade Range
Grade 9–10
Focus: observing that the form of a solid changes how fast it reacts, and learning the vocabulary of surface area, reaction rate and exothermic reaction.
Activities: predict which form of magnesium will finish first and give a reason; run both parts, recording the initial temperature, the highest temperature and the time each reaction takes; sketch the two curves on the same axes and describe in words which is steeper; state the one variable that was changed and list three that were held constant. Conclude with the observation that the powder finished sooner but reached almost the same temperature, and explain why the acid was in excess.
Grade 11
Focus: quantitative treatment — moles, limiting reagent, heat released and mean rate of reaction.
Activities: calculate the moles of magnesium and of hydrochloric acid, show by stoichiometry that magnesium is limiting in both parts, and calculate the volume of hydrogen expected; convert each temperature rise into a quantity of heat with q = m·c·ΔT and then into an enthalpy per mole, comparing the result with the accepted −466.9 kJ/mol; calculate the mean rate of consumption of magnesium in mol/s for each part and express the two as a ratio; explain why the two maximum temperatures should in principle be identical, and identify heat loss as the reason they are not.
Grade 12 / College Level
Focus: deriving the geometric argument and interpreting the shape of the curves independently.
Activities: derive A = 6V/d for a divided solid and use it to estimate the area ratio of powder to ribbon, stating the assumed dimensions; show that the ratio of completion times is set by the smallest half-dimension rather than by the total area, and test that model by calculating the linear recession rate for each run; use the Arrhenius relationship to estimate how much the reaction is accelerated by its own heat and weigh that against the fall in acid concentration, then account for the sigmoid shape of the curves; estimate the calorimeter time constant implied by the difference between the two maxima and comment on whether it is physically reasonable; finally, propose a redesign that would let the initial rates be compared directly rather than the finishing times.
Laboratory essentials
Instruments
- Calorimeter with lid
- Magnetic stirrer built into the calorimeter lid (green start button, red stop button)
- Digital thermometer
- Electronic balance
- Graduated cylinder (250 mL)
- Recovery tank
- Spatula
- Stopwatch
- Tweezers
- Wash bottle
- Weighing boat
Products
- HCl 1 mol/L (solution) — 100 mL for each part
- Magnesium (powder) — 0.60 g
- Magnesium (ribbon) — 0.60 g
- Distilled water (for rinsing)