This laboratory session meticulously outlines an experiment focused on observing chemical reactions between various salt solutions to investigate the formation of precipitates.
Through a series of structured parts, the experiment delves into both direct and reversible reactions.
Educational Goals
- Precipitation Reactions: Participants will gain insights into how ions in solutions interact to form insoluble compounds, deepening their understanding of precipitation reactions.
- Solubility: The experiment allows students to observe the effects of salt solubility in water and its impact on precipitate formation, enhancing comprehension of solubility principles.
- Reversible Reactions: Students will explore the concept of reversible chemical reactions by examining both direct and reverse processes, fostering a broader understanding of chemical dynamics.
- Laboratory Skills Development: This session aims to hone students’ practical skills in handling solutions, observing chemical reactions, and accurately documenting scientific findings.
By engaging in this experiment, students will not only observe the critical role of precipitation reactions within the fields of analytical and inorganic chemistry but also acquire hands-on experience in how ions in solutions interact to create new compounds. This practical exploration into precipitation, solubility, and reversible reactions not only reinforces theoretical knowledge but also enhances laboratory competencies, preparing students for further scientific endeavors.
Protocol
PART A: The electrolysis of water
- Attach the universal clamps to the 2 universal supports on the right; one clamp per support; approximately 20 cm from the base.
- Fill the beaker with 1 L of water using tap water.
- Place the 1L beaker in the center of the 2 supports; under the 2 clamps.
- Fill both test tubes into the brim with tap water.
- Put the stoppers on the openings of the test tubes.
- Secure the two test tubes to the universal clamps by positioning them upside down so that the test tubes are immersed in the 1L beaker filled with water (the opening of the test tubes must always remain submerged).
- Once the test tubes are attached to the clamps, remove the stoppers from the openings. Ensure that no air bubbles have become trapped at their upper end.
- Attach an electrode to each test tube: the positive electrode (red electrode) to test tube 1; and the negative electrode (black electrode) to test tube 2.
- You will find two conducting wires (1 red; 1 black) in front of the current generator.
– Connect the flat part of the red conductor wire to the positive terminal of the current generator (red terminal on the right); and the other end (alligator clip) to the electrode of test tube 1.
– Connect the flat part of the black conductor wire to the negative terminal of the current generator (black terminal on the left); and the other end (crocodile clip) to the electrode of test tube 2.
- Measure 15 mL of hydrochloric acid using the graduated cylinder.
- Pour the contents of the graduated cylinder into the 1L beaker.
- Mix everything for a few seconds using the glass rod.
- Turn on the current generator. Start the stopwatch.
- Let the reaction proceed for about 1 minute. Stop the stopwatch.
- Turn off the generator.
PART B: Product analysis
- Attach a clamp to the left universal stand; approximately 40 cm from the base.
- Remove the electrodes and alligator clips from the immersed test tubes.
- Close the test tubes underwater with the rubber stoppers.
- Remove test tube 1 from the water; still upside down; and secure it upside down to the left stand using its clamp.
- Light a wooden splinter and shake it to make a red ember; then bring it close to test tube 1 (positive).
- Remove the cap from test tube 1 and while keeping the opening of test tube 1 facing downward; quickly insert the splint without touching the sides.
- Put the test tube back on the metal test tube rack; on the shelf at the top right.
- Repeat steps 19 to 22 with test tube 2 (negative).
- The results of the observations are found on the results table.
- Pour the liquids into the recovery beaker on the right counter; and place the used splints in the waste container.
Anticipated Outcomes
Participants embark on an experiment designed to explore the electrochemical decomposition of water into hydrogen and oxygen gases. This experiment not only demonstrates a fundamental chemical reaction but also integrates concepts of electrochemistry, gas collection, and reactivity tests.
Gas generation: When the current passes through the water in the presence of hydrochloric acid (which acts as an electrolyte), electrolysis occurs. This process splits water molecules into hydrogen and oxygen gases, collected in the two test tubes.
Observation of gas reactivity: The red-hot ember introduced into test tube 1 (rich in oxygen from the electrolysis process) should reignite or glow brighter, demonstrating oxygen’s role in supporting combustion. In contrast, when the ember is introduced into test tube 2 (containing hydrogen), there might be a gentle pop sound due to hydrogen’s flammability and its tendency to react explosively with oxygen in the air when ignited.
Significance and lessons learned:
Understanding electrolysis: This experiment provides a clear visualization of electrolysis, an important chemical process with applications ranging from industrial chemical production to the development of clean energy technologies.
Chemical principles and safety: Participants learn to handle chemicals and conduct experiments safely while observing firsthand the reactive properties of hydrogen and oxygen, two fundamental elements in chemistry.
Practical skills: The experiment enhances skills in setting up experimental apparatus, conducting controlled reactions, and interpreting observable results, which are critical competencies in scientific research and laboratory work.
Conceptual connections: By linking theoretical knowledge with practical experience, the experiment reinforces understanding of chemical reactions, stoichiometry (the 2:1 volume ratio of hydrogen to oxygen produced in water electrolysis), and the basic principles of electrochemistry. This lab exercise not only deepens the understanding of chemical and physical properties of water and its constituent gases but also exemplifies the interconnected nature of scientific concepts, demonstrating how they can be applied to understand and manipulate the natural world.
Summary of Assignment by Grade Range
Grades 3-5 (Ages 8-10)
- Focus: Basic introduction to electrolysis and simple observations of gas formation.
- Activities: Observing water electrolysis and noting the formation of bubbles (hydrogen and oxygen gases), simple discussions on the process of electrolysis, basic safety instructions.
Grades 6-8 (Ages 11-13)
- Focus: Intermediate understanding of electrolysis, chemical reactions, and gas production.
- Activities: Conducting water electrolysis, measuring gas production at electrodes, understanding the basic principles of electrolysis, following detailed safety protocols.
Grades 9-12 (Ages 14-18)
- Focus: Advanced understanding of electrolysis, chemical reactions, and stoichiometry.
- Activities: Accurately conducting water electrolysis, measuring and recording gas volumes, analyzing the reaction mechanisms, detailed recording and interpretation of results, adhering to advanced safety protocols, reinforcing concepts of chemical reactions and gas production.
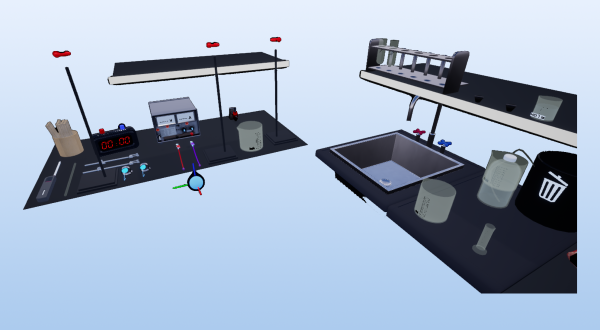
Laboratory essentials
Instruments
- Beaker (750 ml & 1000 ml)
- Electrical wires
- Glass rod
- Graduated cylinder (25 ml)
- Lab power supply
- Lab stand & Clamps
- Test tubes
- Test tubes electrodes
- Timer
- Wood pieces
Products
- HCl 1.0M (solution)