This experience aims to demonstrate dialysis through a simulation of the dissemination of different substances through a semi-permeable membrane, represented by the dialysis bag. Experience illustrates the key concepts of cell biology and chemistry, such as the permeability of membranes, diffusion, and specific chemical reactions to test the presence of certain molecules in a solution.
Educational Goals
Preparation of the solution and heating: The beginning of the experiment is to prepare an aqueous solution and to heat a test tube containing glucose to simulate the preparation of the “virtual cell” and the surrounding solution. Preparation of reagents for tests: preparation of buckets with specific reagents for glucose, starch, and salt prepares the ground to test the presence of these substances after dialysis.
Preparation of the dialysis bag: The experience simulates the cell membrane using a dialysis bag, in which starch, salt, and glucose solutions are placed. The bag is then immersed in distilled water to simulate the extracellular environment. Diffusion and dialysis: The implementation makes it possible to observe the process of diffusion of molecules through the semi-permeable membrane of the dialysis bag, imitating the functioning of a living cell in its environment.
Chemical tests: After a period of dialysis, chemical tests are carried out to identify the substances that have disseminated through the bag. These tests include the use of Lugol to detect starch, Fehling A and B for glucose, and silver nitrate for salt.
Observation of changes: Experience makes it possible to observe the changes in the chemical composition of the surrounding water and inside the dialysis bag, as well as any change in volume in the bag, illustrating the principles of osmosis and diffusion.
Objectives of experience:
- Understand dialysis: demonstrate how substances diffuse through a semi-permeable membrane according to their gradients of concentration.
- Illustrate the principles of diffusion and osmosis: observe directly how molecules move from a high concentration area to a low concentration area, and how this affects volume in the dialysis bag.
- Application of chemical tests: use specific chemical reactions to test the presence of glucose, starch, and salt, stressing the importance of chemical indicators in detection of substances.
This experience offers a practical understanding of fundamental biological and chemical processes, using laboratory techniques to explore key concepts in biology and chemistry.
Protocol
The control solutions (positive)
NaCl and starch
- Using the dropper, place 10 drops of starch solution into the well labeled A.
- Empty the excess from the dropper into the recovery container.
- Using the dropper, place 10 drops of sodium chloride solution into the well labeled D.
- Empty the excess from the dropper into the recovery container.
- Using the dropper, add 10 drops of Lugol’s solution into the well labeled A.
- Empty the excess from the dropper into the recovery container.
- Using the dropper, add 10 drops of silver nitrate into the well labeled D.
- Empty the excess from the dropper into the recovery container.
- Shake cups A and D well using the glass rod.
The observations of the control reactions are found in the results table.
Glucose
- Fill 400 mL of tap water into a 500 mL beaker.
- Insert the magnetic stir bar into the beaker.
- Place the beaker on the hot plate and set to 75°C. Wait until the temperature is reached.
- Turn on the magnetic motor (left button).
- Using the pipette, pour 10 mL of glucose solution into the labeled test tube ( G ).
- Using the pipette, add 10 mL of Fehling A into the labeled test tube (G).
- Using the pipette, add 10 mL of Fehling B into the labeled test tube (G).
- Mix the contents of the test tube by shaking it for a few seconds.
- Place a universal clamp on the left stand, above the 500ml beaker prepared in step 1.
- Attach the labeled test tube (G) to the universal clamp above the center of the beaker.
- Insert the thermometer into the test tube and wait until the temperature in the test tube exceeds 70°C.
- Take the test tube (G) and return it to its initial position on the test tube rack.
- Mix the contents of the test tube by stirring it for a few seconds with the glass rod.
- Once the reaction in the test tube is complete (precipitation), lower the temperature of the heating plate to 15°C.
- Turn off the magnetic motor.
The observations of the control reaction are found in the results table.
Preparation of the osmosis bag and testing of the initial solution
- Pour 300 mL of warm tap water into the 600 mL beaker.
- Soak the dialysis bag in warm water to make it more flexible.
- Place a black cap at the bottom of the dialysis bag to close it.
- In the 10 mL graduated cylinder, successively pour using the pipette 3 mL of starch solution, 3 mL of sodium chloride, and 3 mL of glucose solution. Between each substance, discard the excess into the recovery container.
- Place the dialysis bag on the counter horizontally, with the wide opening facing upward. Pour the contents of the graduated cylinder into this opening.
- Place the empty 250 ml beaker next to the right universal stand.
- Place a universal clamp on the right universal stand, above the center of the beaker.
- Attach the dialysis bag to the right universal stand, using the universal clamp and place the whole setup vertically in the 250 mL beaker. Be careful not to pour the contents of the dialysis bag into the beaker.
- Pour approximately 200 mL of distilled water into the 250 mL beaker so that the contents of the bag are submerged in the water. The water should not touch the end where the opening of the bag is located.
- Using the dropper, draw the liquid from the beaker in which the dialysis bag is soaking and place ten drops of the solution into well B and ten drops of the solution into well E.
- Empty the excess from the dropper into the recovery container.
- Using the dropper, add ten drops of Lugol’s solution into the well labeled B.
- Empty the excess from the dropper into the recovery container.
- Using the dropper, add ten drops of silver nitrate to the well labeled E.
- Empty the excess from the dropper into the recovery container.
- Shake wells B and E well using the glass rod.
- Set the hot plate, on which there is always the beaker of water, to 75°C. Wait until the temperature is reached.
- Turn on the magnetic motor (left button).
- Using the pipette, place 10 mL into the labeled test tube (H) of the water from the beaker in which the bag is soaking.
- Using the pipette, add 10 mL of Fehling A into the labeled test tube ( H ).
- Using the pipette, add 10 mL of Fehling B into the test tube labeled (H).
- Mix the contents of the test tube by shaking it for a few seconds.
- Attach the labeled test tube (H) to the universal clamp above the center of the beaker.
- Insert the thermometer into the test tube and wait until the temperature in the test tube exceeds 70°C.
- Take the test tube (H) and return it to its original position on the test tube rack.
- Mix the contents of the test tube by shaking it for a few seconds with the glass rod.
- Lower the temperature of the heating plate to 15°C.
- Turn off the magnetic motor.
- Wait 24 h (use the clock button to advance time)
Final Solution test
- Using the dropper, draw the liquid from the beaker in which the dialysis bag is soaking and place ten drops of the solution into well C and ten drops of the solution into well F.
- Empty the excess from the dropper into the recovery container.
- Using the dropper, add 10 drops of Lugol’s solution to the well labeled C.
- Empty the excess from the dropper into the recovery container.
- Using the dropper, add 10 drops of silver nitrate into the well labeled F.
- Empty the excess from the dropper into the recovery container.
- Shake wells C and F well using the glass rod.
- Set the hot plate, which always has the beaker of water on it, to 75°C. Wait until the temperature is reached.
- Turn on the magnetic motor (left button).
- Using the pipette, place 10 mL into the labeled test tube (I) of the water from the beaker in which the bag is soaking.
- Using the pipette, add 10 mL of Fehling A into the test tube labeled ( I ).
- Using the pipette, add 10 mL of Fehling B into the test tube labeled (I).
- Mix the contents of the test tube by shaking it for a few seconds.
- Attach the labeled test tube (I) to the universal clamp above the center of the beaker.
- Insert the thermometer into the test tube and wait until the temperature in the test tube exceeds 70°C.
- Take the test tube (I) and return it to its initial position on the test tube rack.
- Mix the contents of the test tube by stirring it for a few seconds with the glass rod.
- Lower the temperature of the heating plate to 15°C.
- Turn off the magnetic motor.
The observations are found in the results table.
- A positive result for the presence of complex carbohydrates will result in a purple coloration (iodine-starch complex) in the well (Lugol’s test).
- A positive result for the presence of NaCl will result in a white precipitate (AgCl) in the well (reaction with silver nitrate).
- A positive result for the presence of simple carbohydrates will result in a brick red precipitate (Cu2O) in the test tube (Fehling’s reaction).
Anticipated Outcomes
Starch Test with Lugol’s solution
The iodine (I-) contained in Lugol’s solution reacts with starch to form an iodine-starch complex. When iodine is added to starch, it fits inside the helical structure of the starch molecules, resulting in a color change to blue-black. This reaction is often used as a qualitative test to indicate the presence of starch.
NaCl Test with silver nitrate
Silver nitrate reacts with chloride (Cl-) to produce a white precipitate of AgCl (s).
Glucose Test
Fehling A: The Fehling A solution is essentially a CuSO4 solution with a molarity of 0.05M, with its’ characteristic sky-blue color due to Cu2+ ions.
Fehling B: The Fehling B solution contains Rochelle salt (potassium sodium tartrate) and NaOH 0.0625M. Fehling’s B solution is typically a clear, colorless liquid.
When Fehling’s A solution is mixed with Fehling’s B solution without heating, the 2 solutions react to form a deep blue complex. This complex is a result of the copper (II) ions from Fehling’s A reacting with the tartrate ions from Fehling’s B in an alkaline environment, forming a copper (II)-tartrate complex. The mixture will be a deep blue color.
Heat is necessary to drive the reduction of copper (II) to copper(I), resulting in a deeper blue color.
When you introduce reducing sugars to the heated Fehling’s solution (a mixture of Fehling’s A and B), a chemical reaction occurs where the reducing sugars donate electrons to the copper (II) ions, reducing them to copper(I) ions. The solution’s color changes from deep blue to light blue, followed by the appearance of a red precipitate, it is indicative of the presence of reducing sugars.
This test is specific for reducing sugars, which are sugars that have free aldehyde or ketone groups capable of acting as reducing agents. Common reducing sugars include glucose, fructose, lactose, and maltose. Non-reducing sugars, like sucrose, do not react in this test unless they are hydrolyzed to their reducing sugar components.
Tests results
- A: blue-black solution (starch)
- B: brownish red (no starch)
- C: blue-black solution (starch)
- D: white precipitate (NaCl)
- E: clear (no NaCl)
- F: clear (no NaCl)
- G: deep blue color
- G: brick red precipitate (glucose)
- H: deep blue (no glucose)
- I: red precipitate (glucose)
After osmosis
Water has moved from outside the cell to inside. This is observed by the water level in the beaker, which has slightly decreased, and by the bag, which has slightly enlarged. Glucose and starch have moved from inside the bag to the external medium. They are detected in the water surrounding the bag using Lugol’s iodine and Fehling’s solution tests. The concentration of substances inside and outside the membrane, as well as the size of the particles is relative to the size of the membrane’s pores.
This could be explained by 3 principles:
- Water movement: This describes a process like osmosis, where water moves across a semi-permeable membrane from an area of lower solute concentration to an area of higher solute concentration. In this case, the water inside the beaker (outside the cell or bag) moves into the bag (representing the cell), causing the water level in the beaker to decrease and the bag to expand as it fills with water.
- Movement of glucose and starch: This indicates that glucose and starch, initially inside the bag, have moved to the outside environment (the beaker water). This movement could be due to dialysis, a process where smaller molecules and ions can move through a semi-permeable membrane, while larger molecules cannot. The presence of glucose and starch in the external solution is confirmed using specific tests: Lugol’s iodine test for starch, which turns blue-black in the presence of starch, and Fehling’s solution test for reducing sugars like glucose, which results in a color change when glucose reduces the copper (II) ions in Fehling’s solution to copper(I) oxide.
- Concentration and particle size: This statement refers to the factors influencing the movement of substances across a membrane. The concentration gradient (the difference in substance concentration inside and outside the membrane) and the relative size of the particles compared to the membrane’s pore size determine which substances can pass through the membrane. Larger particles or molecules that exceed the pore size of the membrane cannot pass through, while smaller ones can.
Summary of Assignment by Grade Range
Grades 3-5 (Ages 8-10)
- Focus: Basic introduction to osmosis and diffusion, simple preparation steps, and basic observations.
- Activities: Preparing simple solutions, basic use of a dialysis bag, and introductory chemical tests.
Grades 6-8 (Ages 11-13)
- Focus: Intermediate understanding of osmosis and diffusion, detailed preparation steps, and intermediate observations.
- Activities: Preparing and heating solutions, using a dialysis bag for diffusion experiments, and applying chemical tests.
Grades 9-12 (Ages 14-18)
- Focus: Advanced understanding of osmosis and diffusion, detailed preparation and observation, and comprehensive chemical testing.
- Activities: Preparing detailed solutions, performing complex diffusion experiments with a dialysis bag, and conducting in-depth chemical tests and analyses.
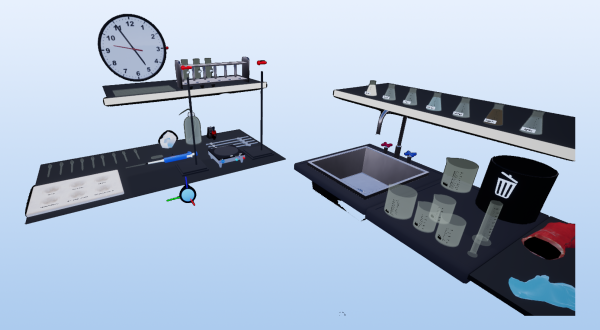
Laboratory essentials
Instruments
- Beaker (250 ml & 600 ml)
- Erlenmeyers (50 mL)
- Bucket plate
- Droppers
- Pipette
- Graduated cylinder (10 ml & 100 ml)
- Hot plate
- Lab stand & Clamps
- Osmosis bag
- Test tubes
- Glass rod
Products
- Fehling A solution
- Fehling B solution
- Glucose solution
- Lugol 2% solution
- Silver nitrate solution
- Sodium chloride in solution
- Starch solution